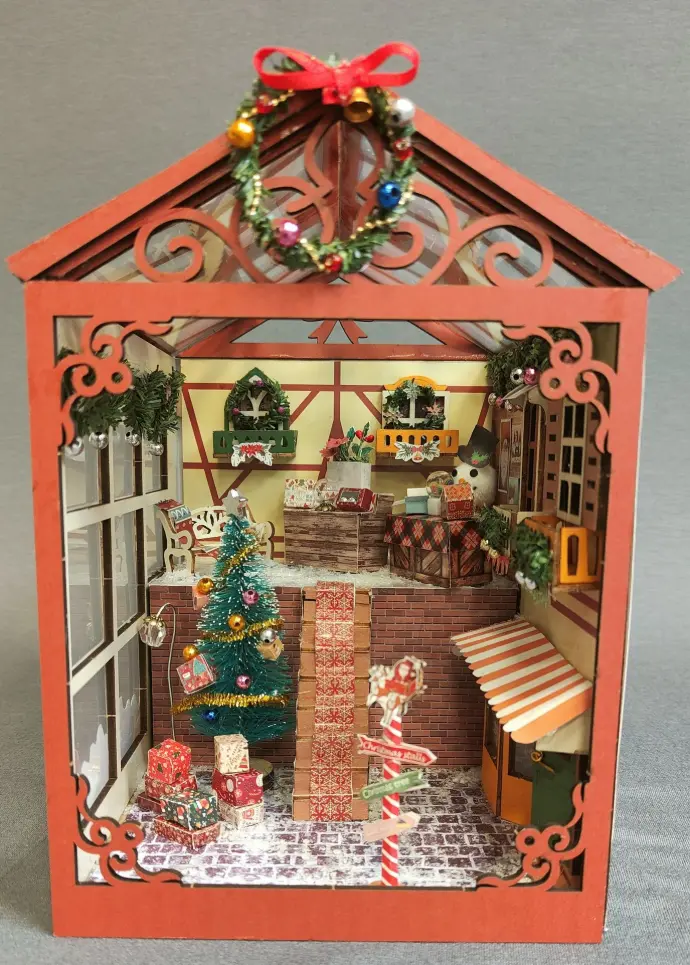
Christmas Storefront
Craft & Co
Ce kit était ma première tentative de kit « miniature ». Ce kit de vitrine de Noël comprend 72 pièces en papier imprimé, balsa, fil de fer, acétate et perles. J'ai utilisé de la colle PVA transparente, une pince coupante, des ciseaux et de la super colle pour le construire. Les éléments en papier comprenaient de petits modèles imprimés de boîtes de différentes tailles, qu'il fallait découper, rainurer et coller ; la plus petite boîte mesurait à peine 1 cm de côté ! Pour assembler les couronnes, il fallait façonner le fil de fer et attacher la verdure, puis ajouter divers embellissements. De petites décorations ont ensuite été fixées sur le petit sapin de Noël à l'aide de super colle (et d'un accélérateur - très utile !! -). Les deux tables ont été fabriquées en balsa pressé et recouvertes d'un papier à motifs. Diverses décorations pour la table ont été assemblées, y compris une petite boule à neige et des petites boîtes d'ornements miniatures. Un lampadaire a été fabriqué à l'aide de fil de fer, de petits disques métalliques et d'un globe en plastique. Un poteau de signalisation a été assemblé en balsa et décoré avec du papier à motifs et de petites flèches directionnelles. Le banc en bois, accessoirisé d'une écharpe d'hiver découpée dans du papier à motifs, est un accessoire supplémentaire. Les jardinières, la devanture avec l'auvent et les portes sont également en balsa. Ces éléments ont été assemblés à l'aide de colle super et décorés à l'aide de divers embellissements inclus dans le kit. L'un des murs latéraux est accompagné d'une feuille d'acétate pour créer l'effet de fenêtre. Malheureusement, dans ce kit, je n'ai pas pu enlever la protection. Le mur latéral a été décoré avec du fil de fer et de la verdure pour former une guirlande agrémentée de petites perles. Le mur opposé est orné de deux entrées de magasin, dont une avec auvent. Le haut du mur comprend des lucarnes agrémentées de décorations de Noël. Le mur du fond comporte un escalier menant à un deuxième niveau. Les escaliers ont été créés à l'aide de morceaux de bois assemblés avec de la colle PVA et recouverts de papier à motifs. Au sommet se trouvent d'autres fenêtres et jardinières décorées de couronnes. Le toit est un assemblage de deux sections de bois collées avec de l'acétate pour donner un effet de lucarne. La partie avant est ouverte et possède un toit à pignon sur lequel est fixée une couronne. Traduit avec DeepL.com (version gratuite)
Lors de cette première tentative, j'ai fait beaucoup de petites erreurs, mais j'ai trouvé que c'était une bonne expérience d'apprentissage. J'ai notamment appris quel type de colle fonctionnait le mieux avec les différents types de matériaux fournis dans le kit. En fin de compte, ce fut une expérience très agréable et j'ai déjà commencé à travailler sur mon prochain projet « miniature », une boutique de tailleur !
By Burnettie Jadoul
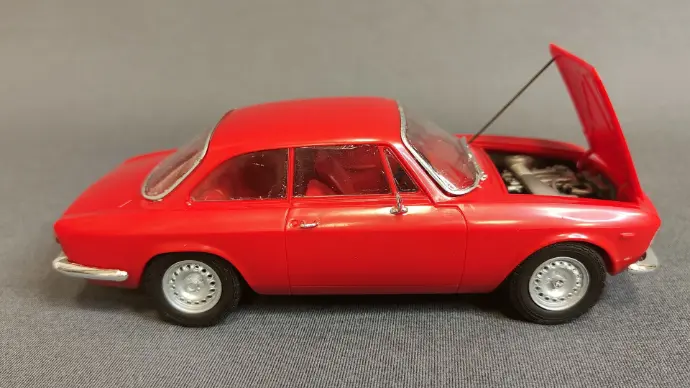
Alfa Romeo Alfetta
Tamiya 1/24
Par Simon Lambinon
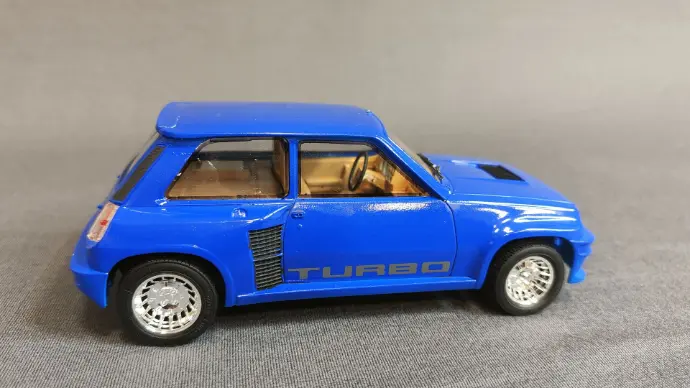
Renault 5 Turbo
Tamiya 1/24
Par Simon Lambinon
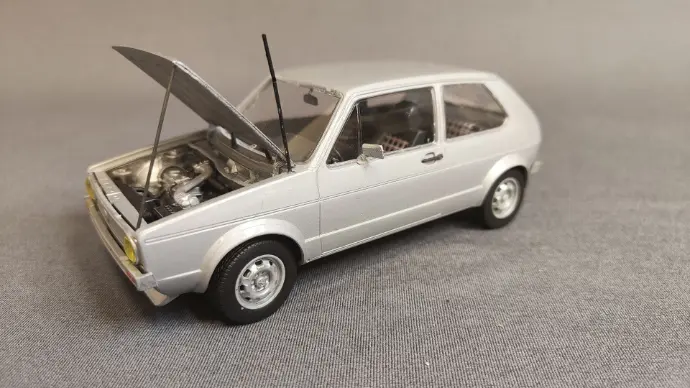
VW Golf Mk.1
Revell 1/24
Par Simon Lambinon
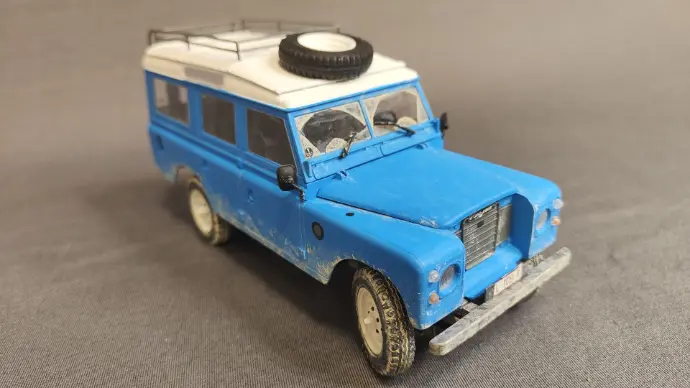
Land Rover Series III
Revell 1/24
Par Florence Trigallez
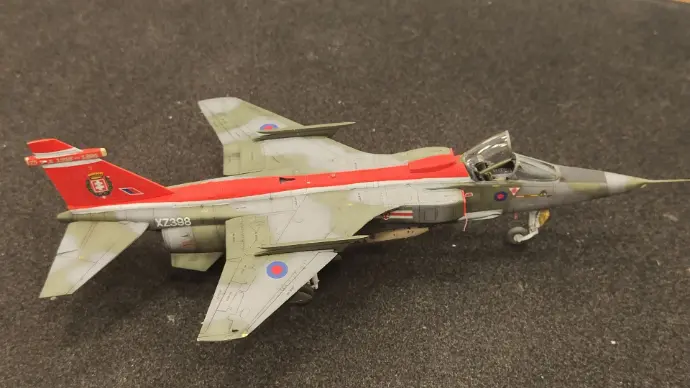
Republic F-84F Thunderstreak
Special Hobby 1/72 Décals Daco & Stropdecals
Par Sébastien Dirich
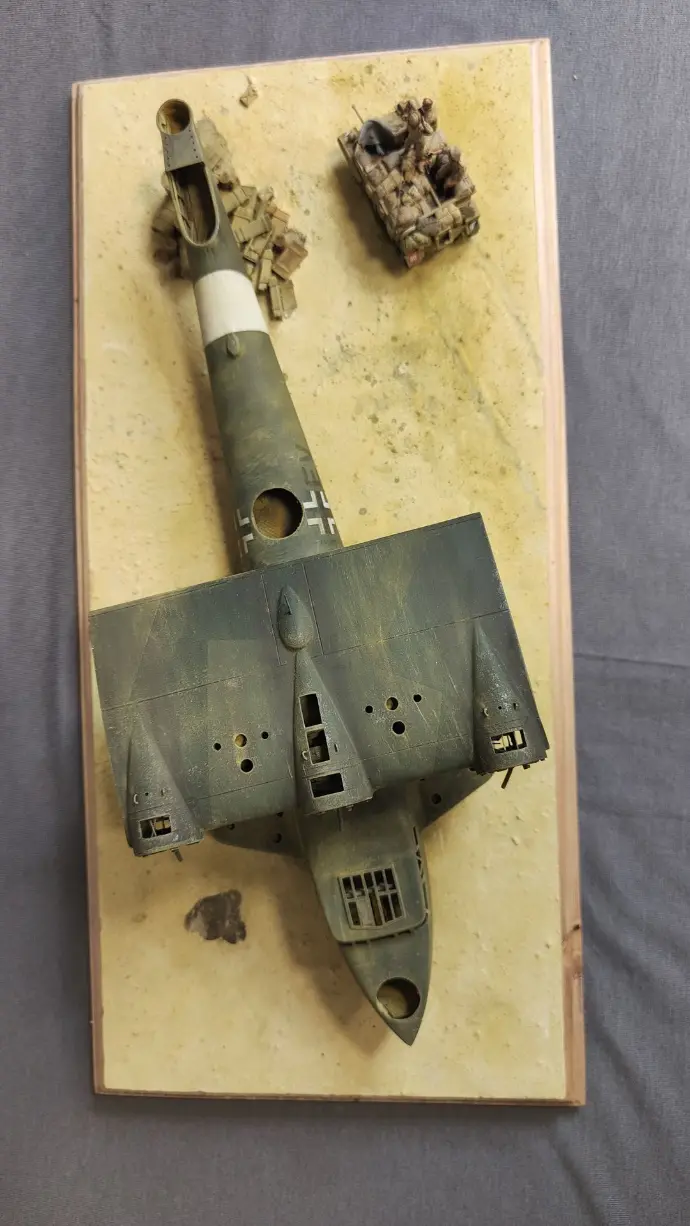
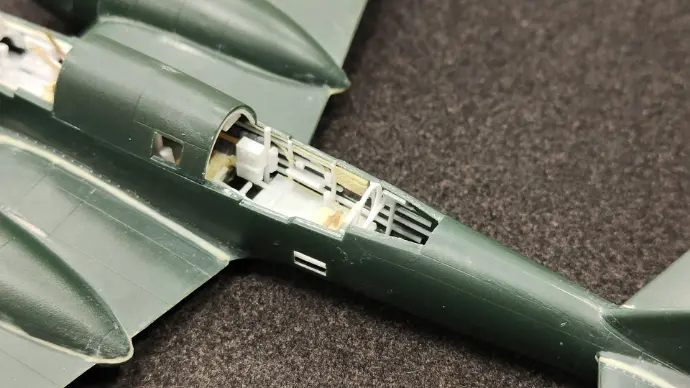
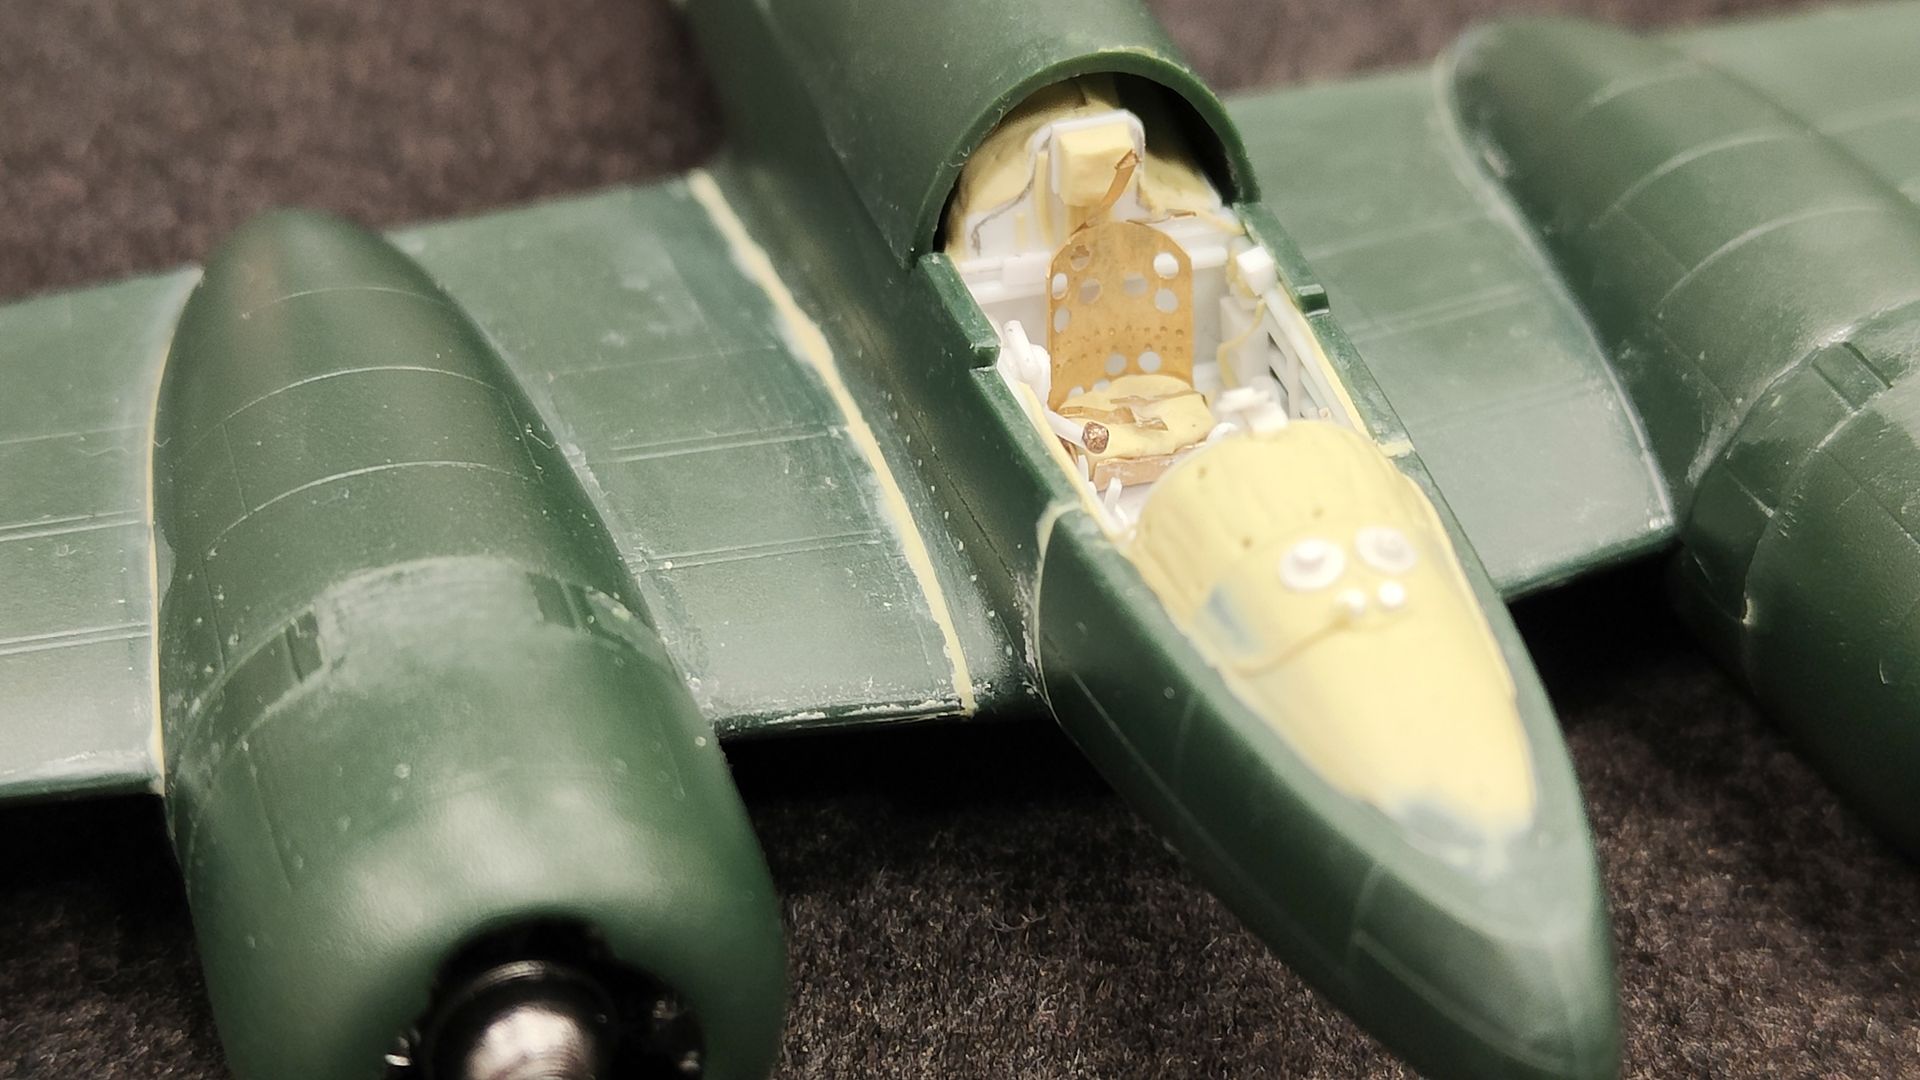
Dornier DO 24 T - Low & Dry
Italeri 1:72
Following a little challenge from my friend Luc Simon (a silly story about propellers, alas, which resulted in the creation of a Group Build with the sweet name of ‘It flies and it floats’), here is a Dornier Do 24T-2 in poor condition, in Egypt, towards the end of 1942. This aircraft, used as a transport and sea rescue aircraft with Seenotstaffel 7, was damaged on the ground during an Allied bombing raid on 12 July 1942, then abandoned and cannibalised. Here, New Zealand troops survey the skies as they advance along the African coast. It's an old 1:72 Italeri kit that I had lying around my house; I was inspired to build it while leafing through an Osprey book on the operations of these aircraft over the Mediterranean, which includes a small photo of the abandoned beast. The big advantages are that without its tail, there's no need to put swastikas on it, and without most of its wing, there's no need to build an annex to the house to put it on display! Building this aircraft required quite a bit of preparation work, in particular a ‘certain layout’ of the inside of the fuselage (from one end to the other!) and of the central section of the wing in order to minimise the ‘see-through’. It's a lot of work that doesn't really show in the end, but then, that's what model making is all about. Another difficulty, apart from a rather delicate assembly and a lot of unsightly joints to make disappear, was hollowing out the glass panes of the big canopy, one by one, trying not to break anything...! Airbrush, Humbrol enamel colours, then watercolour, weathering with all sorts of things and final dusting with pastel powders. The Do 24 entered service in 1937 and was used during the Second World War by the Germans, Spanish, Dutch (East Indies) and Australians (1 example came from the East Indies). The French (who produced some during the Occupation), the Swedes (1 interned) and the Spanish continued to use them for many years after the conflict. The beach is made from a thin layer of plaster on a beautiful wooden base provided by my friend Jean-Michel Vanderheyden. The Bren Carrier is a small IBG kit, in 1:72 scale of course. The figures are from the Millicast range (1:76), and are all more or less transformed to blend in with the vehicle.
By Dominique Jadoul
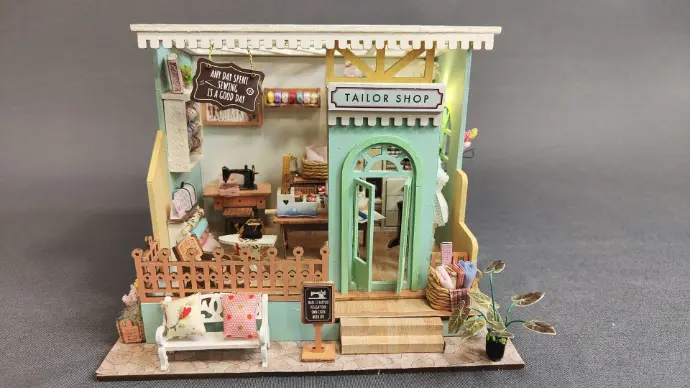
Tailors' shop
Craft & Co
By Burnettie Jadoul
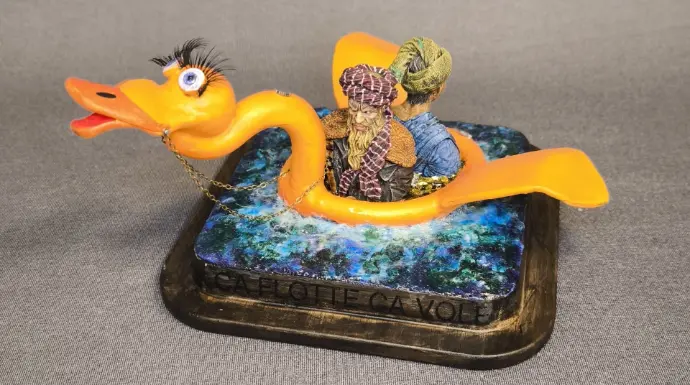
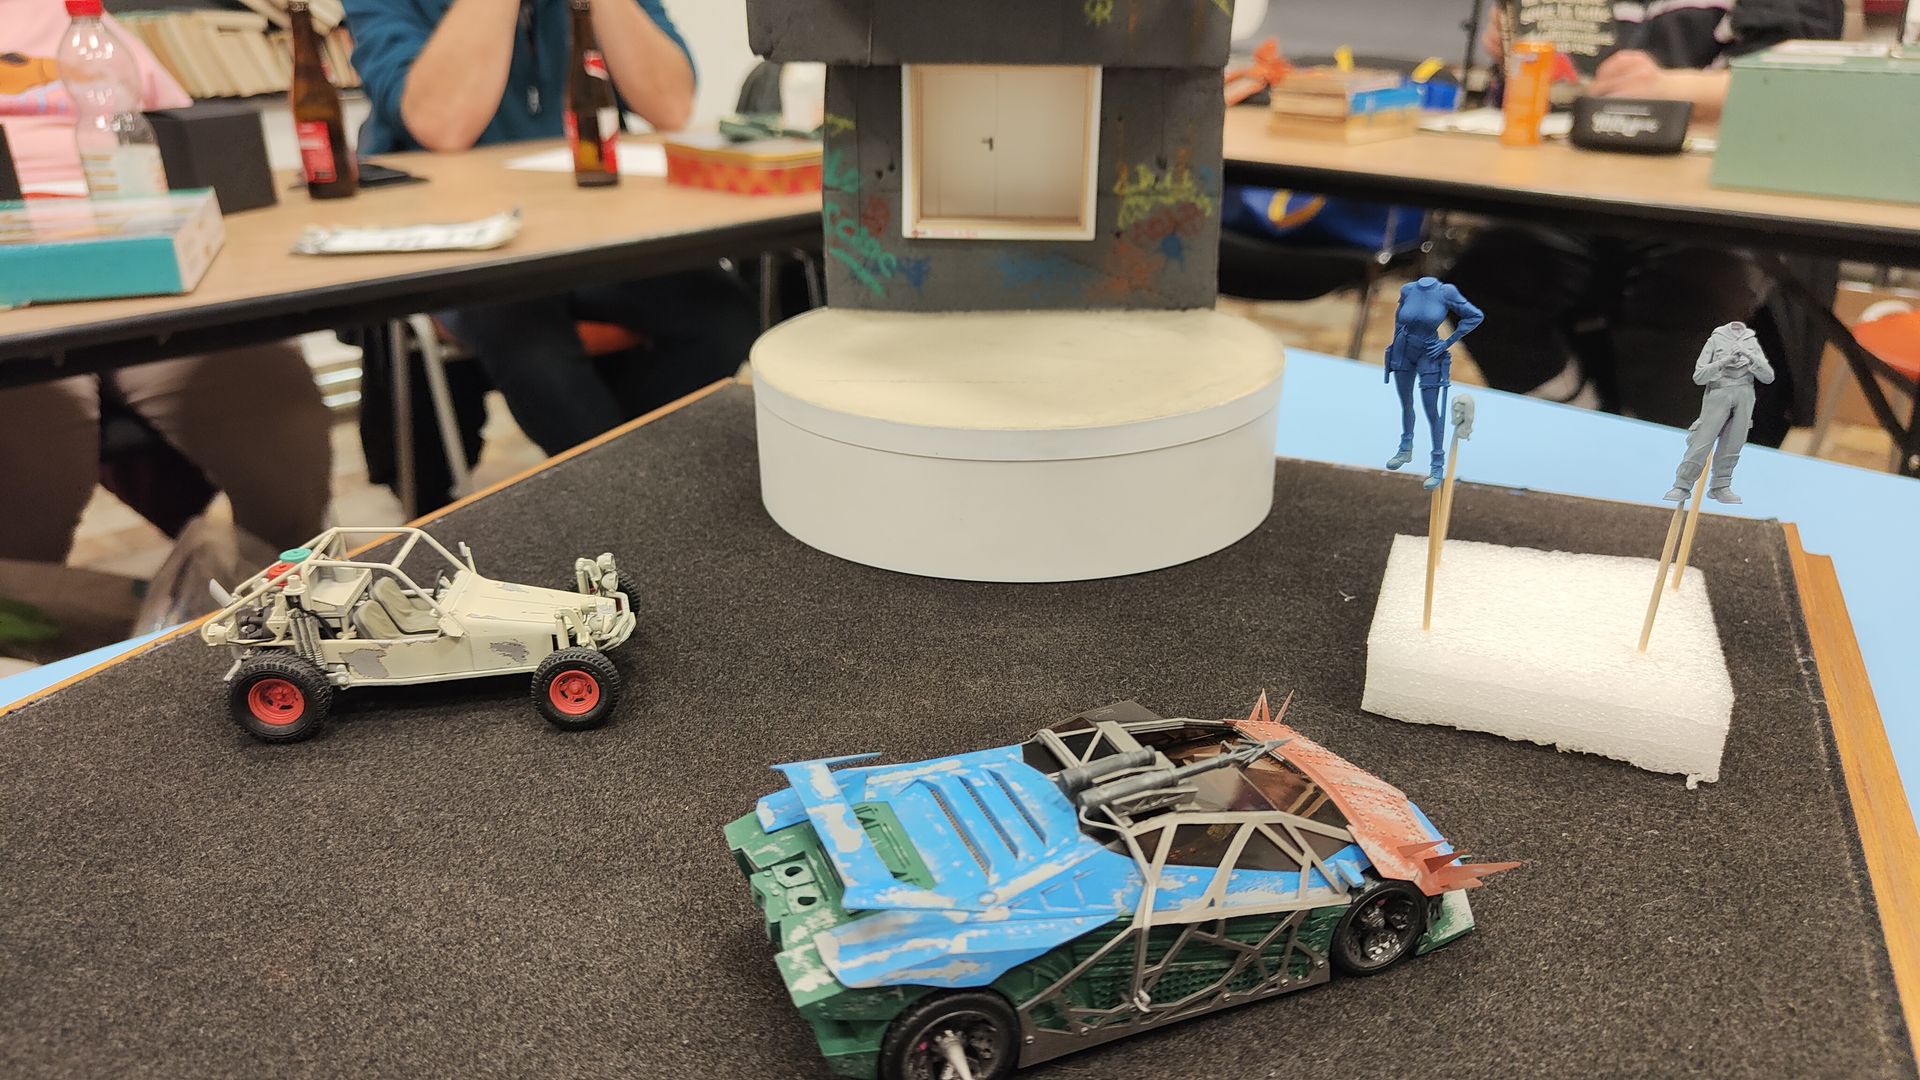
"Ca vole & ça flotte"
3D printing
Vignette produced as part of the Group Build of the same name
By Alain Reynders
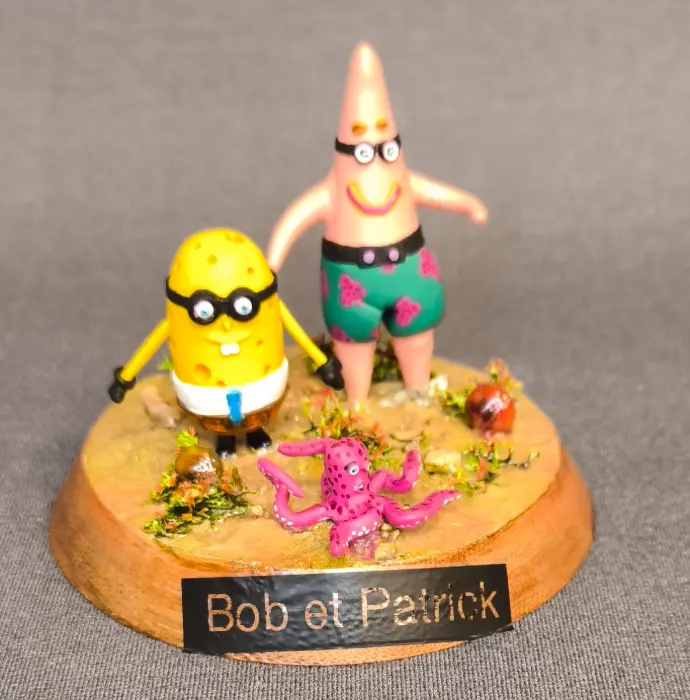
Bob & Patrick
3D printing
By Alain Reynders
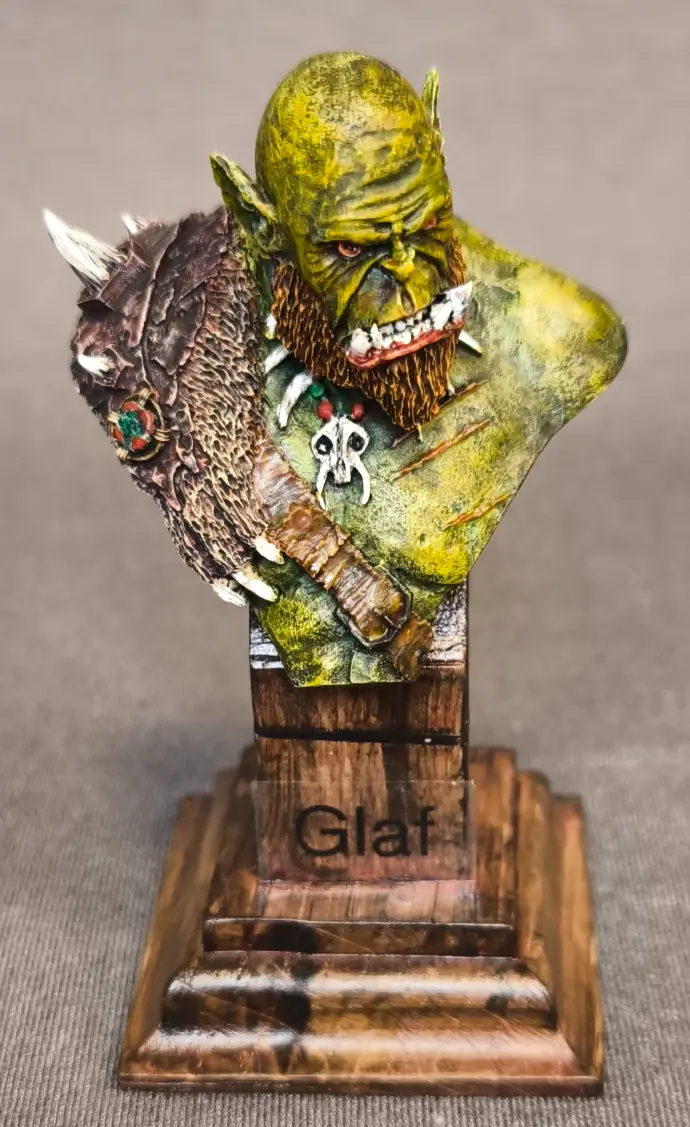
Glaf
3D printing
By Alain Reynders
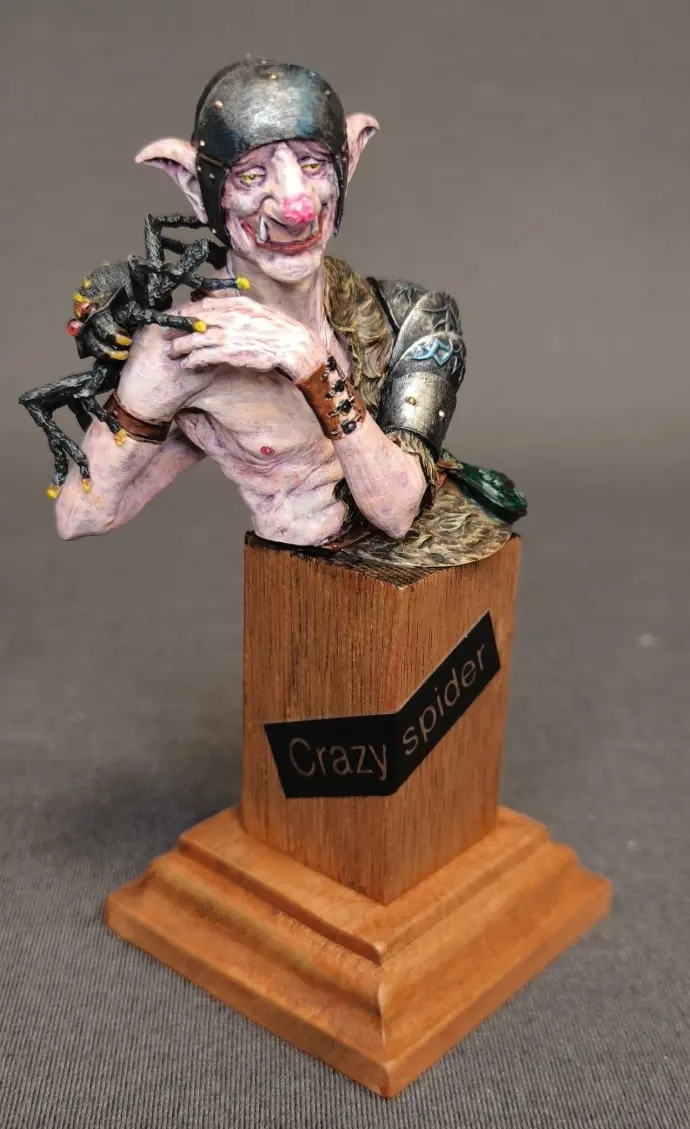
Crazy Spider
3D printing
By Alain Reynders
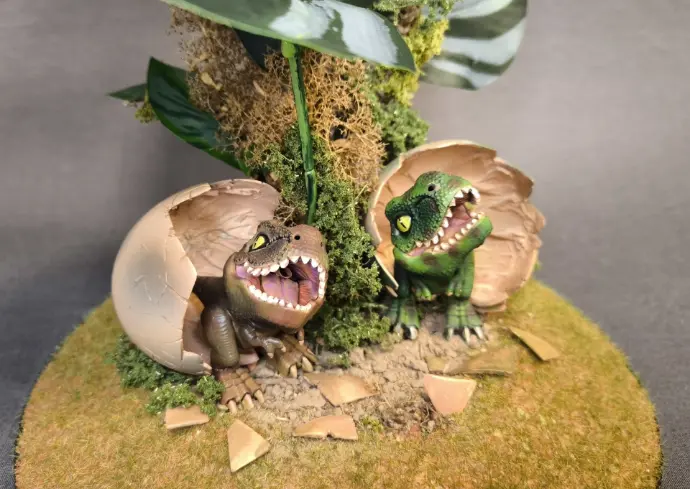
T’Rexes
Ruby toys
By Claude Antoine
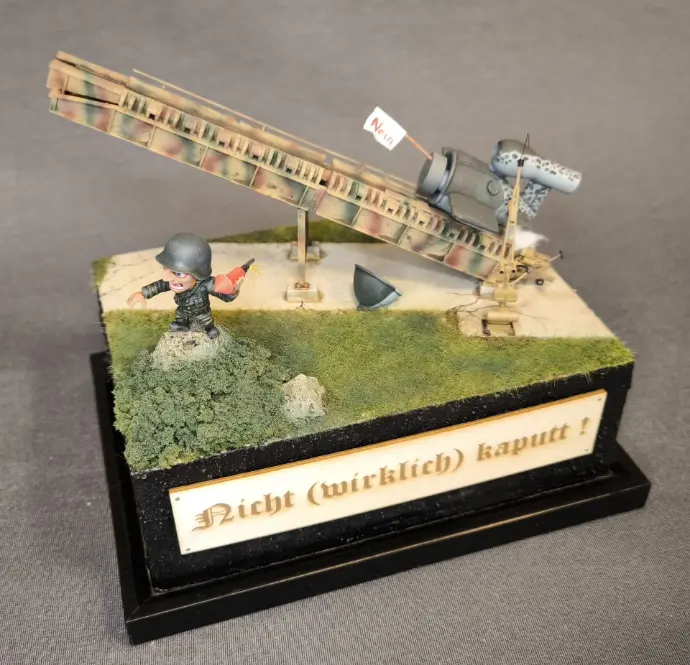
Nicht (wirklich) kaputt!
3D printing + Modelcollect + Scratch 1:72
Whatever the technical problems, the German soldier is resourceful!
This is a 3D printed V1 chibi in difficulty on its launch pad. This is modified from the 1/72 Modelcollect kit. Finally, the soldier is also 3D printed, from which I've removed the gear on his back. The steam-generating trolley and the launch preparation device are added to the ramp, both more or less caricatured and scratchbuilt.
By Dominique Jadoul
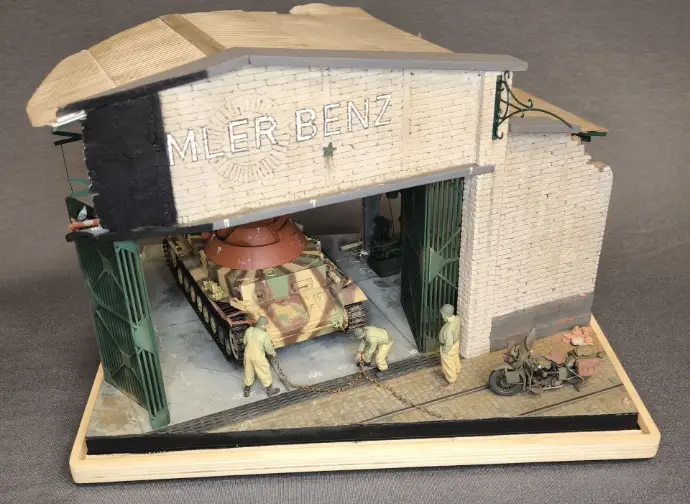
The Discovery
Border Model + Miniart accessories, Plusmodels, 3D printing and Scratch
1:35
In mid-January, I bought Border's 1/35 Kugelblitz Panzer IV kit on a whim.
After some research on the web, it appears that this vehicle remained in prototype form and, depending on the source, between 1 and 5 examples were operational. The modifications were more than likely carried out at Daimler.
The vehicle was designed on the basis of a Panzer IV H or J chassis (more than likely on salvaged chassis).
Given the lack of data on the operation of the machine, I decided to stage this production.
This is a project for an anti-aircraft gun with a closed combat compartment offering meagre ballistic protection against small arms and shrapnel.
Armament consists of two twin 3 cm cannons with a rate of fire of 15 rounds per second.
The turret is quite unusual (a completely enclosed sphere) and is based on the model normally used on Typ XXI submarines.
The various sources come from the web.
It's early 1945, during the American advance into Germany, and three GIs have just discovered this strange contraption in a partly destroyed factory.
The men then decided to salvage this very special vehicle and prepare it for towing.
By Renaud Labarbe
Réalisations en préparation uniquement pour cette réunion
Mitsubishi Ki-46 Dinah
LS 1/72
By Dominique Jadoul
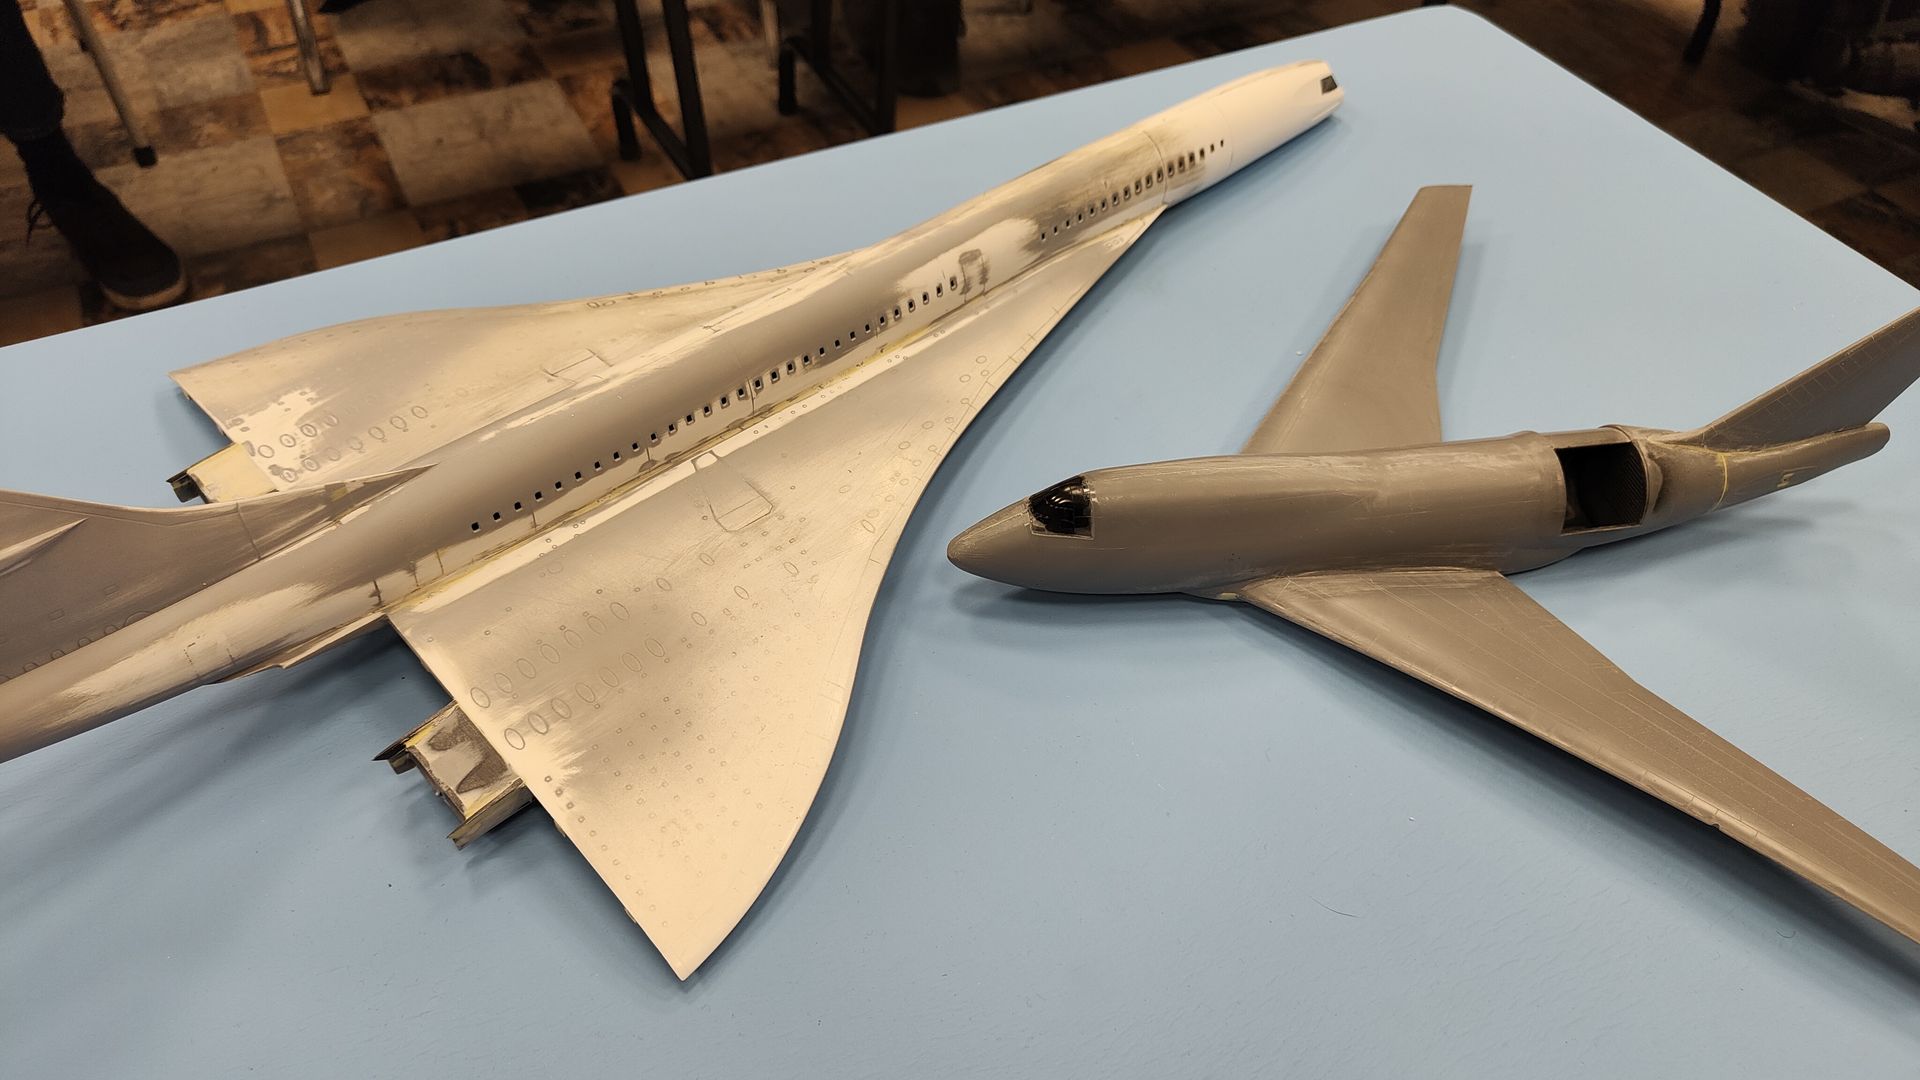
Concorde & Boeing 747SP SOFIA
Airfix/Heller 1/72 & AMP 1-144
Pour l'unboxing du Boeing 747SP SOFIA voir ICI
By Dominique Jadoul
Survivor
Suyata, HobbyBoss + Scratch 1/32
By Renaud Labarbe